> ## Documentation Index
> Fetch the complete documentation index at: https://moengage-docs-limits-messaging.mintlify.site/llms.txt
> Use this file to discover all available pages before exploring further.
# Bring Users Back with Exit Intent Communications
# Introduction
Detecting exit intent and engaging with your users one last time before they exit can go a long way in making them extend their session. Sending exit intent communications, like pop-up messages or banners, is crucial for boosting conversions before visitors leave your website. Using exit intent technology, you can send real-time communications to bring them back to the website. The following are some use cases we can achieve with this strategy:
* Encourage users to extend their sessions of watching a series or listening to an audiobook.
* Encourage users to complete their purchases when leaving the payment page.
* Make users complete their KYC verification before leaving the documents upload page.
#### Advantages of bringing users back with exit intent communications
* **Reduce cart abandonment**: Exit intent communications can help recapture sales by offering discounts, free shipping, or other incentives to encourage visitors to complete their purchase before leaving.
* **Increase conversions**: By presenting a compelling offer or addressing hesitations, these messages can nudge visitors to take the desired action, whether it's making a purchase, subscribing to a newsletter, or downloading a resource.
* **Grow your email list**: Exit intent pop-up messages can be used to capture contact details in exchange for valuable content or offers, helping you build your subscriber base.
* **Improve customer retention**: By offering a positive experience and addressing potential issues, you can increase the likelihood that visitors will return to your website in the future.
* **Create scarcity**: Highlighting limited-time offers or limited quantities can create a sense of urgency and encourage immediate action.
We will achieve this use case by [creating an On-site Messaging (OSM) campaign](/use-cases/on-site-messaging-\(osm\)/bring-users-back-with-exit-intent-communications#create-an-osm-campaign) to encourage users to complete their purchases when they try to exit from the payments page.
# Expected Result
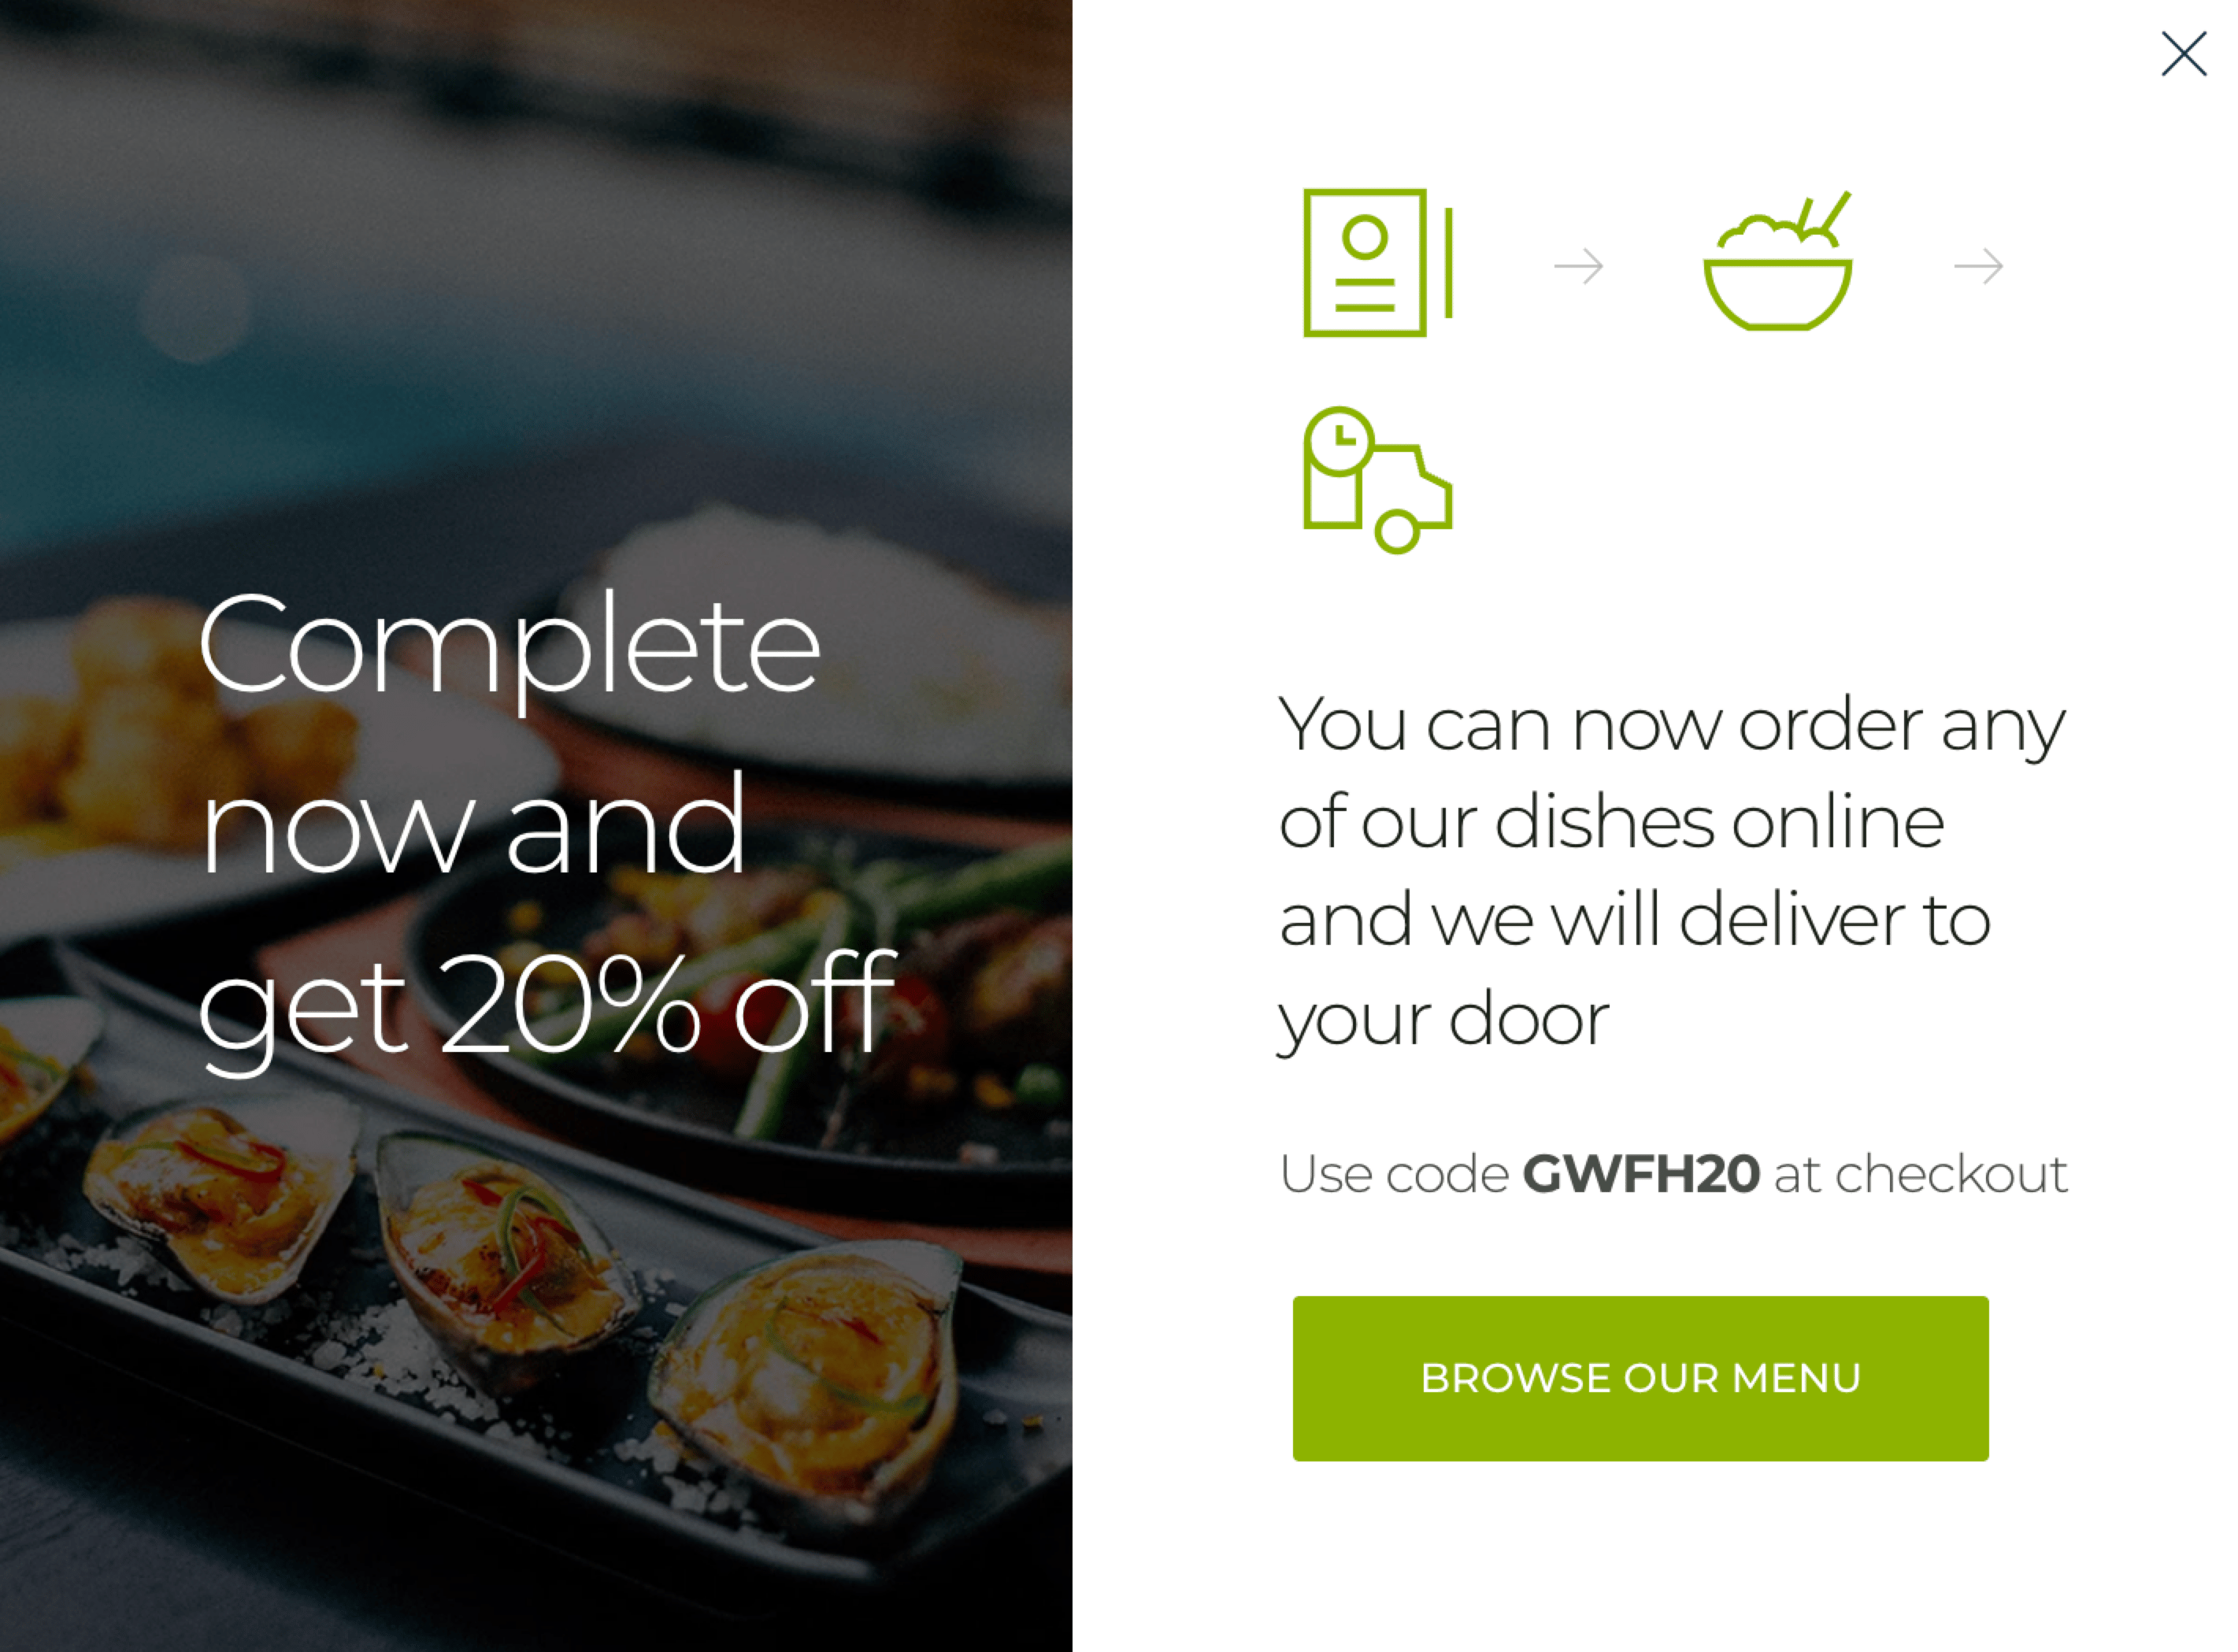
When users visit the website, they will see a pop-up message.
 Your platform must be integrated with the MoEngage Web SDK. For more information, refer to [Web SDK](/developer-guide/web-sdk/web-sdk-integration/basic-integration/web-sdk-integration).
# Create an OSM Campaign
In this section, we will create an OSM campaign to show communications when a user attempts to exit the website.
## Step 1: Target Users
1. On the left navigation menu in the MoEngage dashboard, click **Engage**, and then click **Campaigns**.
2. On the All campaigns page, click **+ Create campaign**.
3. Under **Inbound**, click **On-site**.
Your platform must be integrated with the MoEngage Web SDK. For more information, refer to [Web SDK](/developer-guide/web-sdk/web-sdk-integration/basic-integration/web-sdk-integration).
# Create an OSM Campaign
In this section, we will create an OSM campaign to show communications when a user attempts to exit the website.
## Step 1: Target Users
1. On the left navigation menu in the MoEngage dashboard, click **Engage**, and then click **Campaigns**.
2. On the All campaigns page, click **+ Create campaign**.
3. Under **Inbound**, click **On-site**.
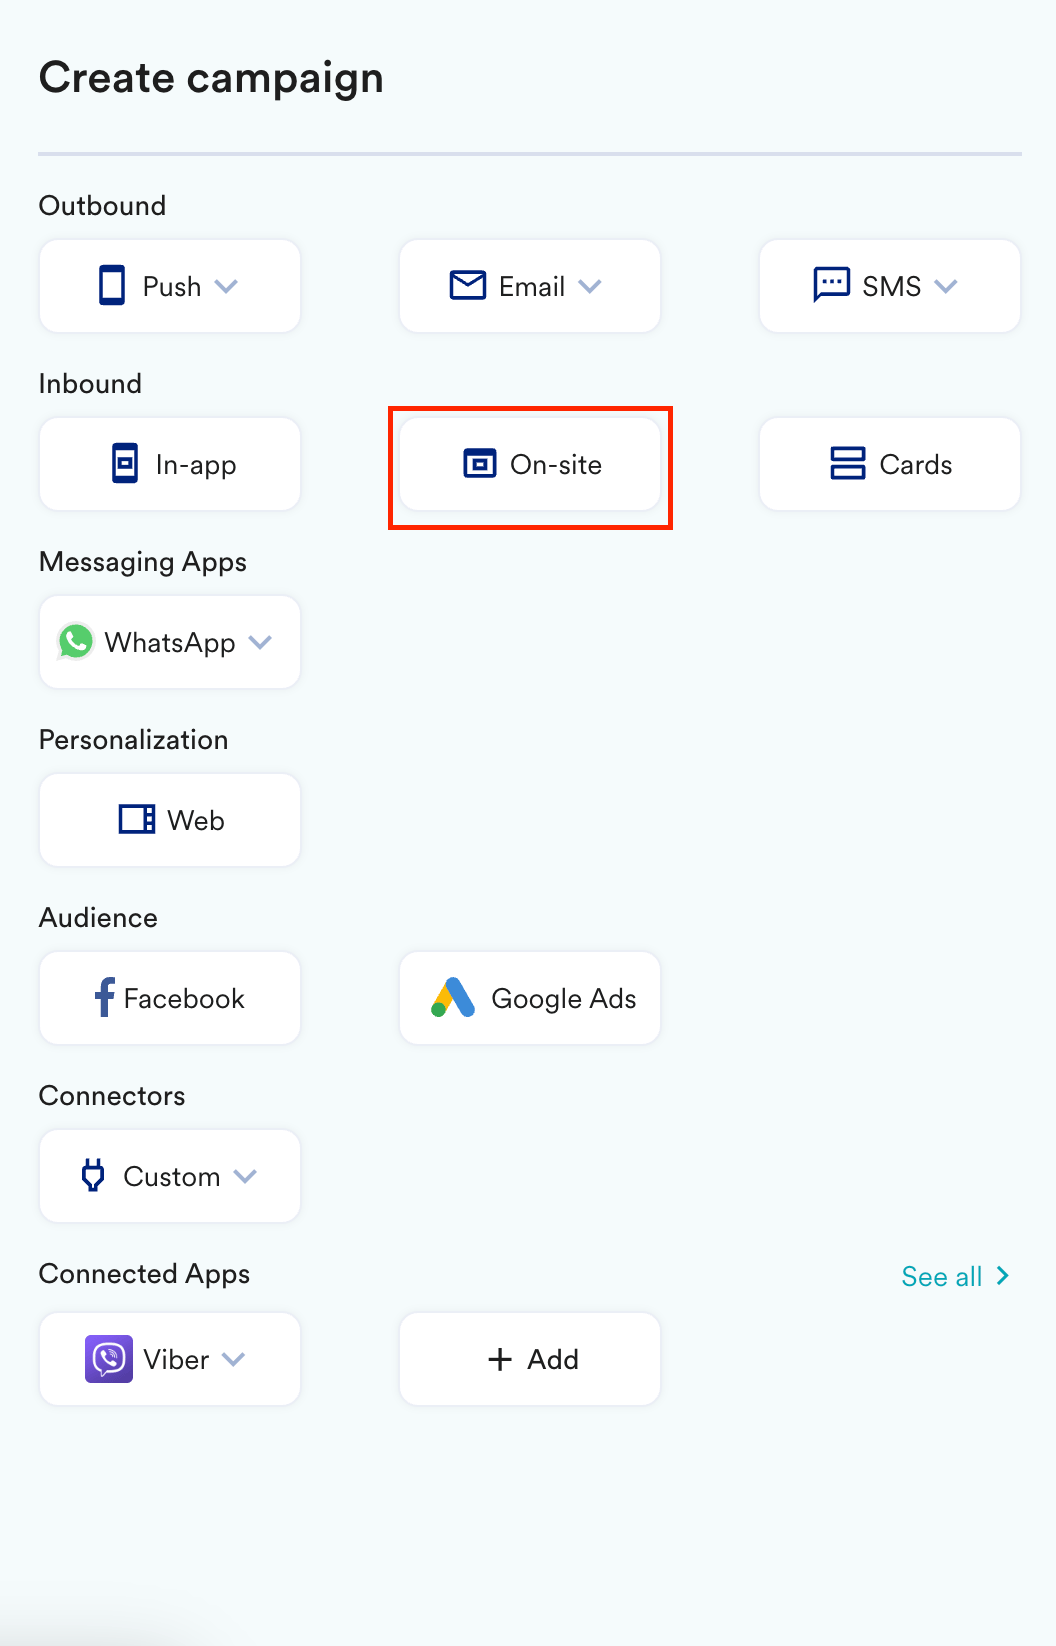 You are taken to the first step, **Target users**, in defining your campaign.
4. Define your campaign with a name and tags.
5. In the **Target platforms** section, select **Web** and **Mobile Web**.
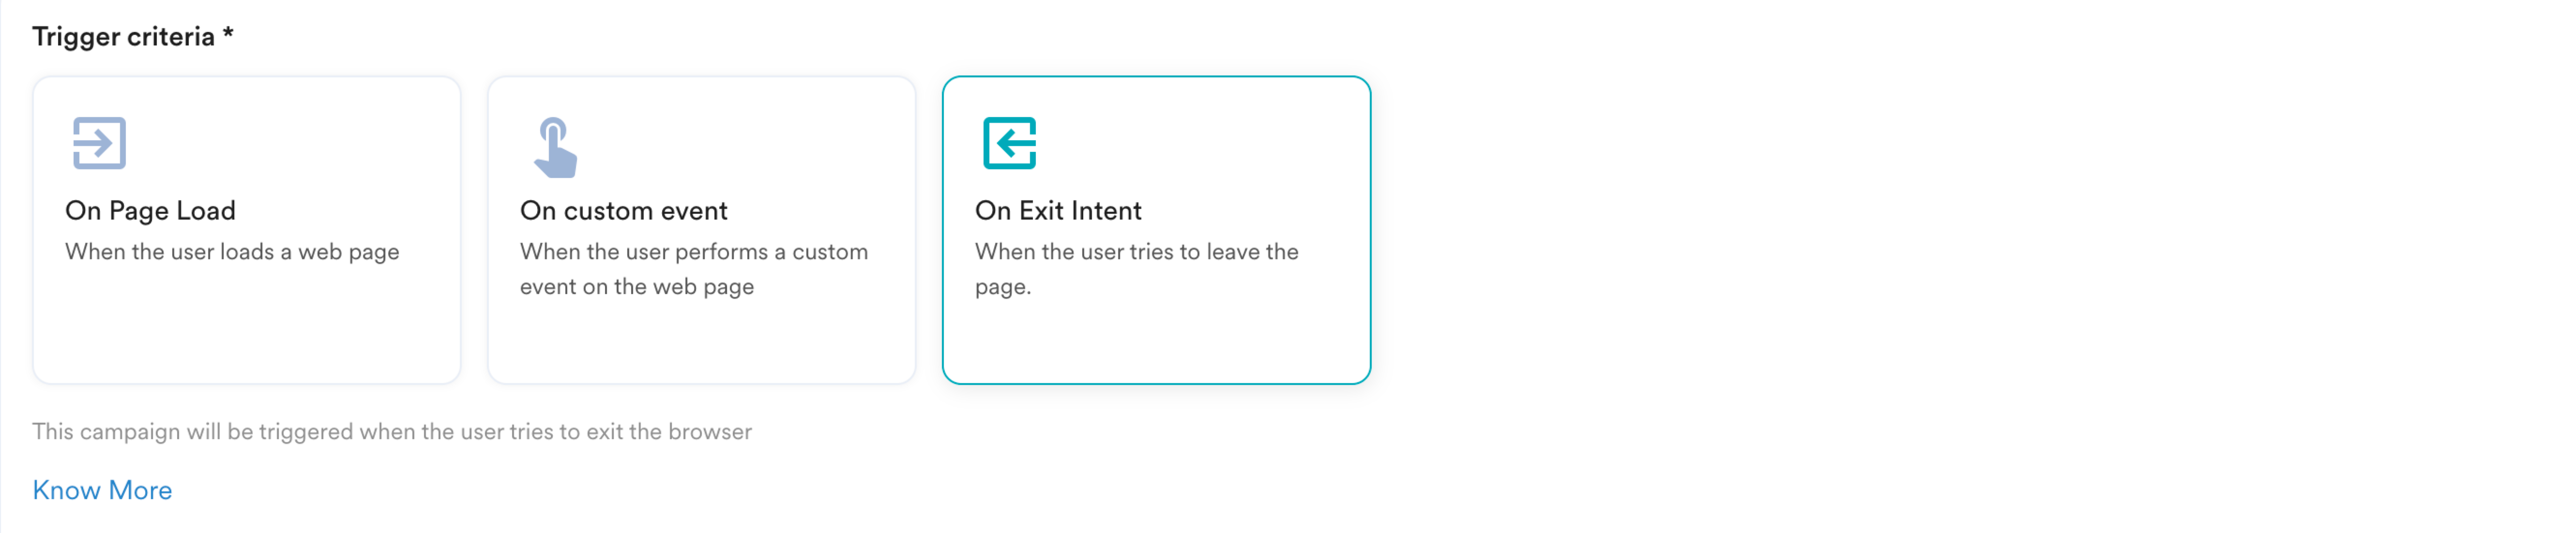
6. In the **Trigger Criteria** section, click the **On Exit Intent** card. This will ensure that the campaign is displayed to your users when they attempt to leave the page. For more information on defining exit intent, refer to [Exit Intent Technology](/user-guide/campaigns-and-channels/on-site-message/create/exit-intent-technology).
You are taken to the first step, **Target users**, in defining your campaign.
4. Define your campaign with a name and tags.
5. In the **Target platforms** section, select **Web** and **Mobile Web**.
6. In the **Trigger Criteria** section, click the **On Exit Intent** card. This will ensure that the campaign is displayed to your users when they attempt to leave the page. For more information on defining exit intent, refer to [Exit Intent Technology](/user-guide/campaigns-and-channels/on-site-message/create/exit-intent-technology).
 7. In the **Select pages** section, you will define where you would want to display the campaign. Select **Specific pages** to display the campaign on specific pages of your website and define the condition as shown below.
 Our aim is to ensure users complete payment and do not exit the page before doing so. You can click the **+** icon to add more conditions and click **And** or **Or** to define the logic to be applied.
8. In the **Target audience** section, select **All users**.
9. Click **Next** to move to the second step, **Content**, where we will define the content for your campaign.
## Step 2: Content
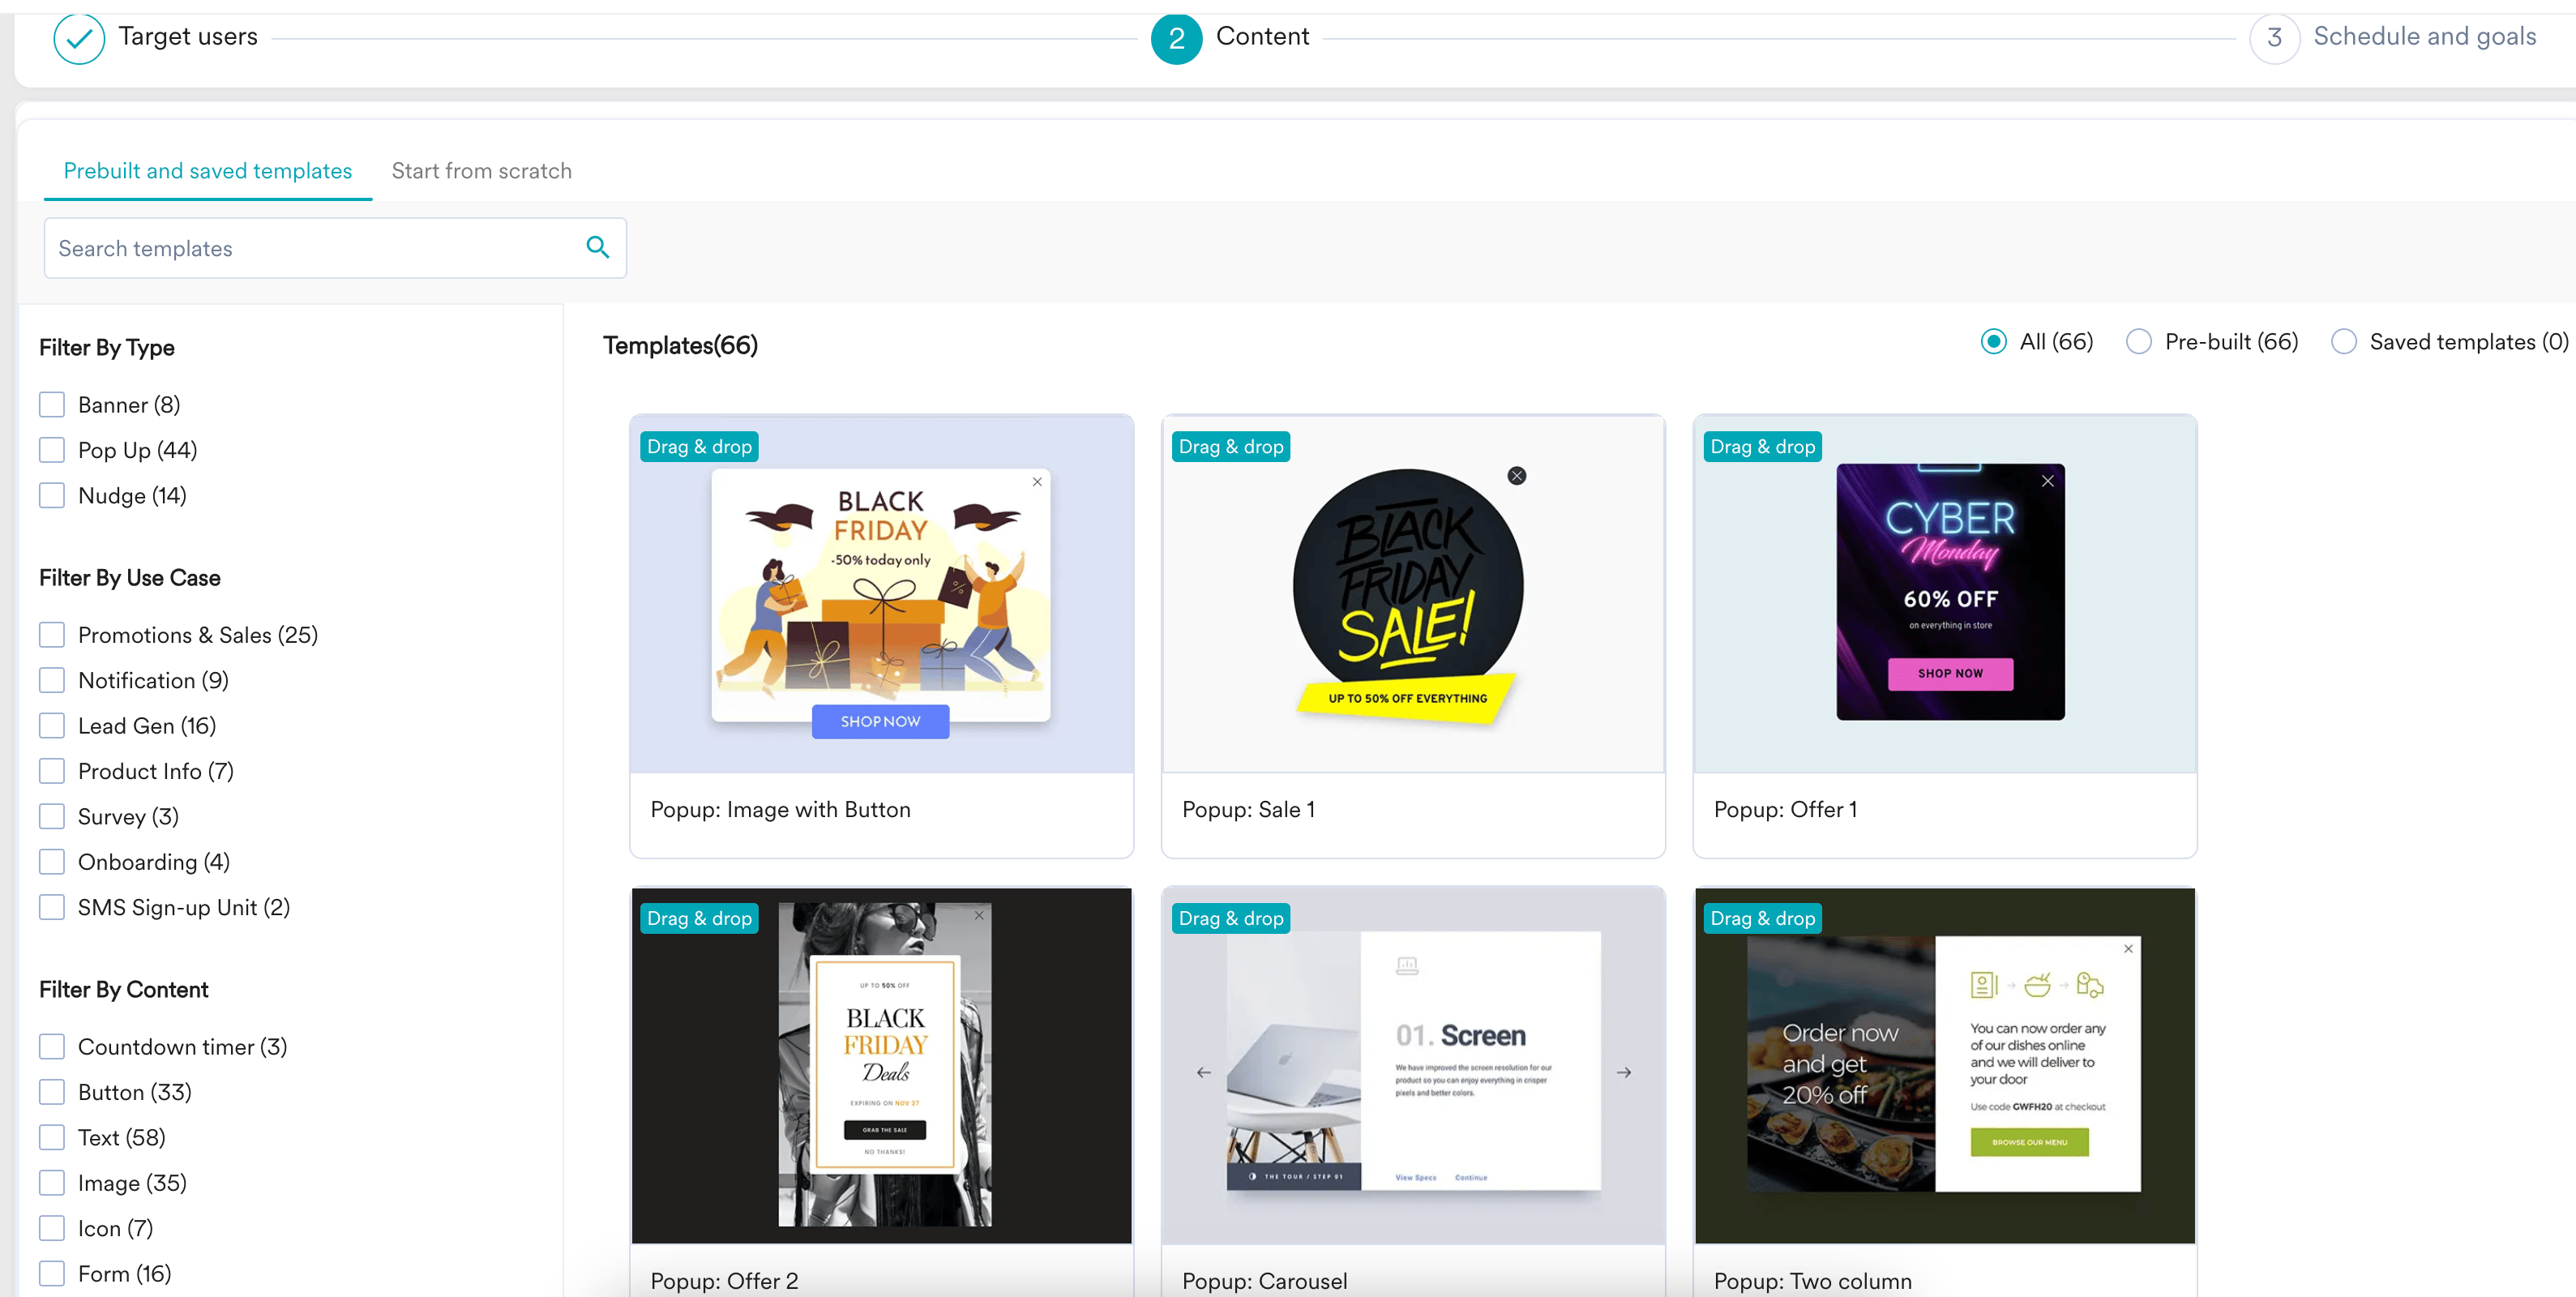
1. On the **Prebuilt and saved templates** tab, use the search box to search with the keyword *pop-up* to find the pop-up templates.
2. Select the desired template from the **Templates** section. Alternatively, you can start from scratch and build your own template by selecting **Blank Popup Template** in the **Start from scratch** tab.
Our aim is to ensure users complete payment and do not exit the page before doing so. You can click the **+** icon to add more conditions and click **And** or **Or** to define the logic to be applied.
8. In the **Target audience** section, select **All users**.
9. Click **Next** to move to the second step, **Content**, where we will define the content for your campaign.
## Step 2: Content
1. On the **Prebuilt and saved templates** tab, use the search box to search with the keyword *pop-up* to find the pop-up templates.
2. Select the desired template from the **Templates** section. Alternatively, you can start from scratch and build your own template by selecting **Blank Popup Template** in the **Start from scratch** tab.
 3. After the template loads, you can edit it and define the OSM according to your requirements. Click the **+** icon on the left to add new elements to your campaign.
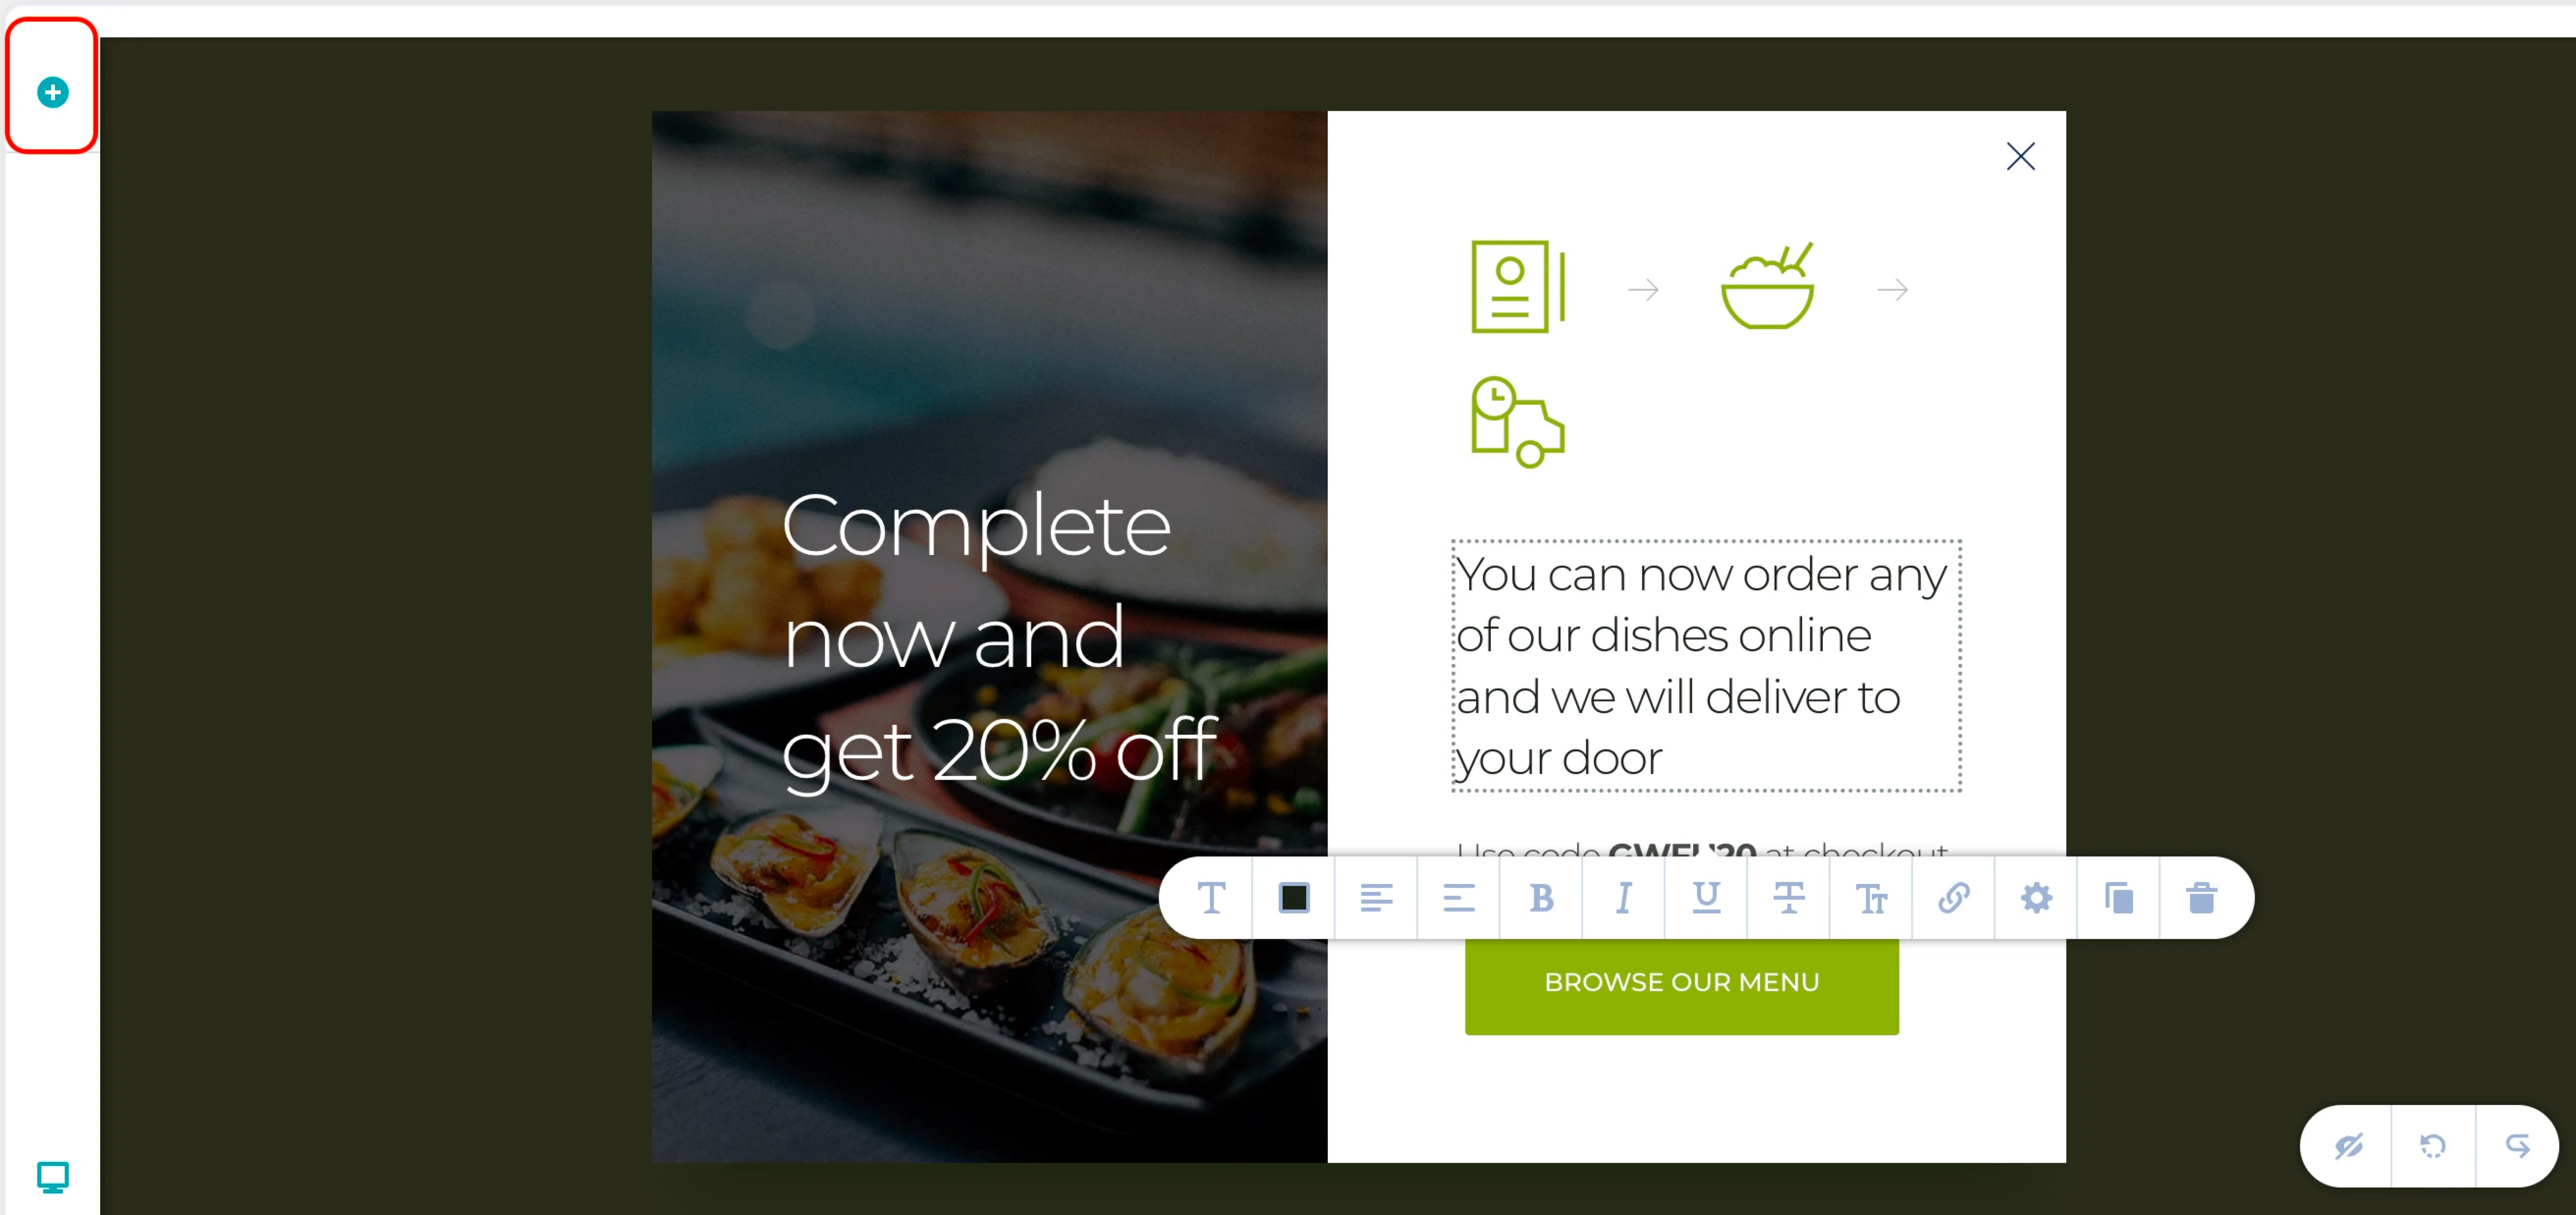 4. If you track other information, such as the user’s name or any other item, use it to personalize your campaign. For our example, you can add the dish that the user was trying to add and related information to personalize your campaign. Personalized campaigns can perform better than generic ones because such personalization makes the message more contextual and makes the users feel connected.
5. Click **Next** to move to the third step, **Schedule and goals**, where we will define your campaign's schedule and goals.
## Step 3: Schedule and Goals
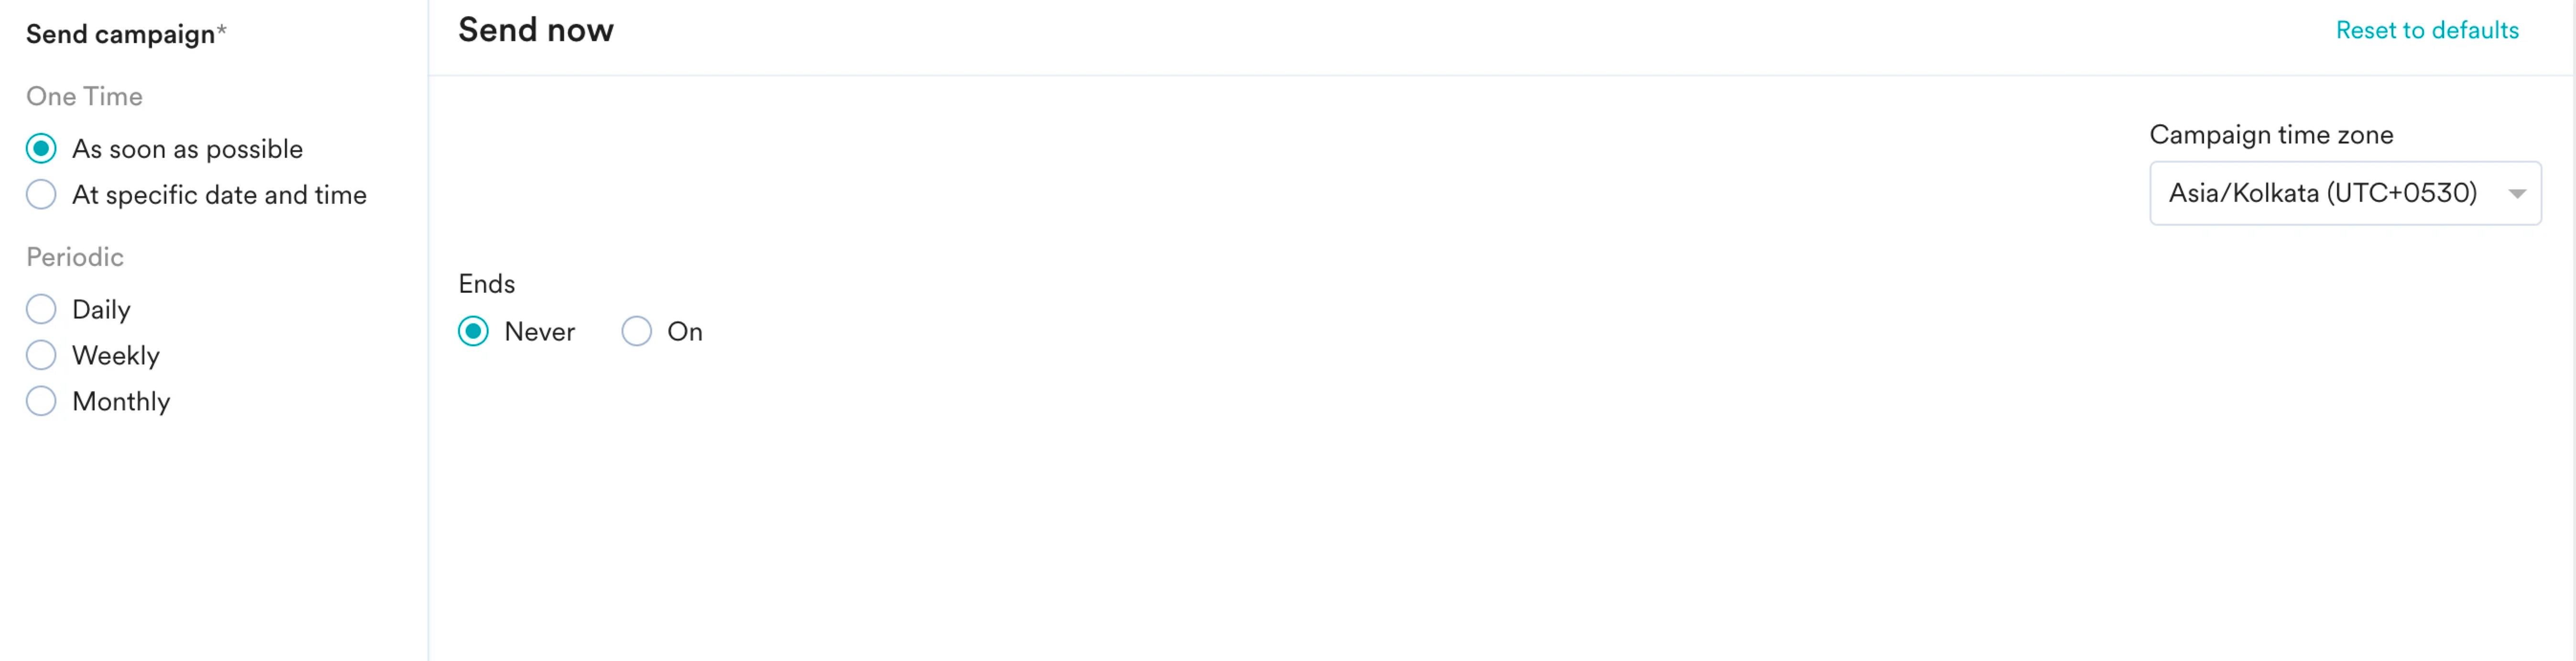
1. In the **Send campaign** section, define when you want to start and end your OSM campaign.
4. If you track other information, such as the user’s name or any other item, use it to personalize your campaign. For our example, you can add the dish that the user was trying to add and related information to personalize your campaign. Personalized campaigns can perform better than generic ones because such personalization makes the message more contextual and makes the users feel connected.
5. Click **Next** to move to the third step, **Schedule and goals**, where we will define your campaign's schedule and goals.
## Step 3: Schedule and Goals
1. In the **Send campaign** section, define when you want to start and end your OSM campaign.
 2. In the **Conversion goals** section, add conversion goals that you like to track.
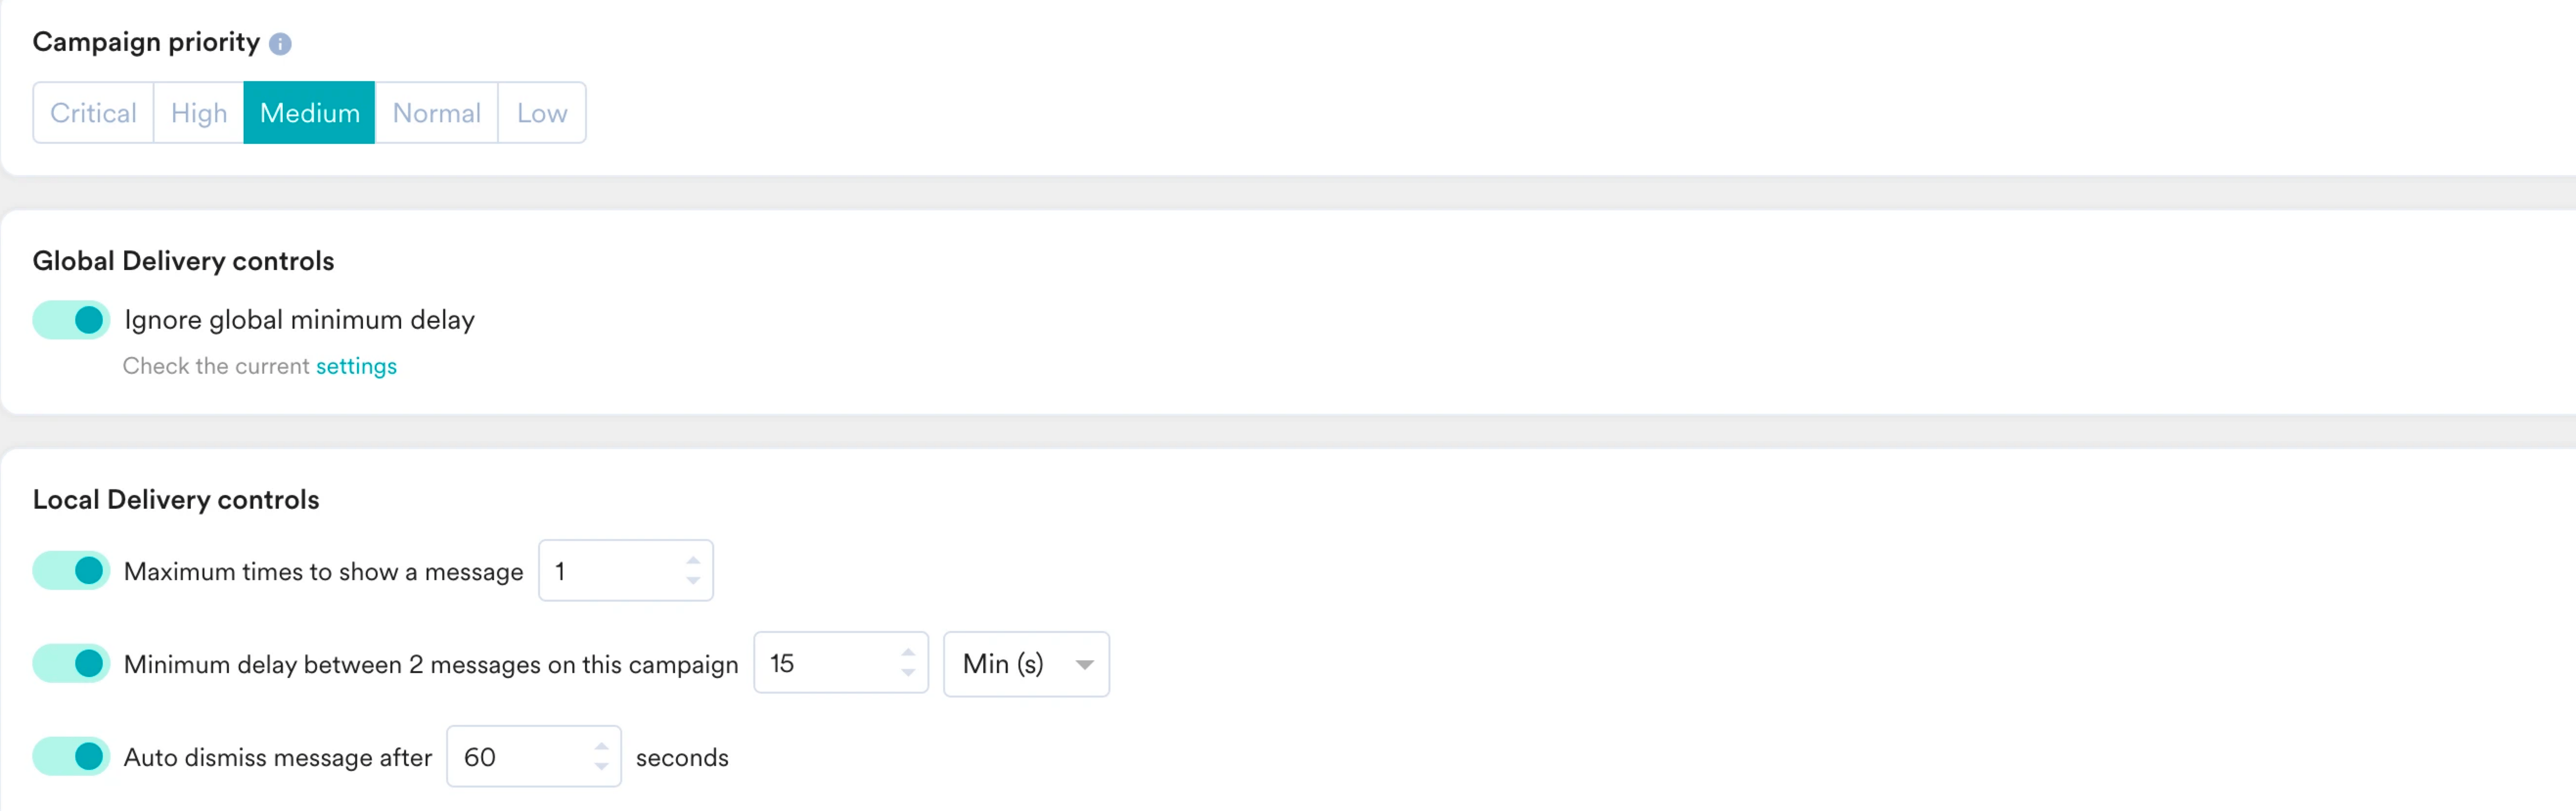
3. In the **Campaign priority** section, assign a priority to this campaign. For example, selecting **Critical** ensures that the users will always see the campaign even when there are other campaigns for which they are eligible. For more information, refer to [Create OSM Campaign](/user-guide/campaigns-and-channels/on-site-message/create/create-osm-campaign).
4. In the **Global Delivery controls** section, turn the **Ignore global minimum delay** toggle on to override the defined minimum delay between any two campaigns defined in settings.
5. In the **Local Delivery controls** section, define the controls based on your requirements. For more information, refer to [Create OSM Campaign](/user-guide/campaigns-and-channels/on-site-message/create/create-osm-campaign).
2. In the **Conversion goals** section, add conversion goals that you like to track.
3. In the **Campaign priority** section, assign a priority to this campaign. For example, selecting **Critical** ensures that the users will always see the campaign even when there are other campaigns for which they are eligible. For more information, refer to [Create OSM Campaign](/user-guide/campaigns-and-channels/on-site-message/create/create-osm-campaign).
4. In the **Global Delivery controls** section, turn the **Ignore global minimum delay** toggle on to override the defined minimum delay between any two campaigns defined in settings.
5. In the **Local Delivery controls** section, define the controls based on your requirements. For more information, refer to [Create OSM Campaign](/user-guide/campaigns-and-channels/on-site-message/create/create-osm-campaign).
 6. Click **Publish**.
The campaign is now published. The submitted response is stored in the user attribute in the MoEngage user profile.
# Conclusion
In this use case, we created a campaign to encourage users to complete their purchases when they attempt to exit the payment page.
Now that we have published the campaign, we can track its CTR and conversions (if defined) to understand its performance. For more information, refer to [Analyze On-site Messaging Campaigns](/user-guide/campaigns-and-channels/on-site-message/analyze/analyze-on-site-messaging-campaigns).
6. Click **Publish**.
The campaign is now published. The submitted response is stored in the user attribute in the MoEngage user profile.
# Conclusion
In this use case, we created a campaign to encourage users to complete their purchases when they attempt to exit the payment page.
Now that we have published the campaign, we can track its CTR and conversions (if defined) to understand its performance. For more information, refer to [Analyze On-site Messaging Campaigns](/user-guide/campaigns-and-channels/on-site-message/analyze/analyze-on-site-messaging-campaigns).